Have you ever ordered a side of bacon and wish you had more? Is “do you want bacon on your burger?” even a legit question to you? Do you usually have more crumbled bacon than leaves of lettuce in your salad?
If you answered “YES!” to any of these questions, then I have a recipe for you!
Bacon is made from pork belly after it has been cured for a specific amount of time and then smoked in a smoker. You can eat bacon for breakfast, lunch, dinner, dessert or whenever. The difference between pork belly bacon and Canadian bacon is from the cut of the pig. Bacon is from the belly and Canadian bacon, which is leaner, is from the back meat of the pig. Both are incredibly delicious but both are prepared quite differently.
Bacon can be eaten alone or incorporated into a ton of different recipes. Bacon burgers, bacon macaroni and cheese, BLT’s, bacon wrapped steaks, bacon in salads, and hundreds of other possibilities. There is no wrong time to have bacon in your fridge and freezer and, by smoking it yourself, a sure fire way to impress friends, family, and even in-laws!
I have spent years getting this one tweaked just right and have been using it for the last couple of months for my family and friends. It involves patience, a large container to fit a pork belly, and a smoker big enough to fit your pork belly. If you follow these steps, you two will be known as your neighborhood’s Bacon King!
THE PREP
I get my pork belly from my large membership grocery store but many other stores and butcher shops will have pork belly readily available. When picking out the BEST belly, I look for the one with the most marbling and has a “flop” to it when I lift it up; you do NOT want a stiff pork belly. Sure, you may LOOK funny picking up a pork belly and flopping it around but, in the long run, you’ll be glad you picked the perfect one. You also might start a trend at the grocery store, too!
THE TRIM
I don’t trim this one much at all. If my belly has a few pieces of silver skin I may dig them out, otherwise, where I get them from, they’re ready to go. I lay my belly on a long sheet of parchment paper and dry it thoroughly with a paper towel then I prep my rub.
MITCH TIP: It is very important to remove any and all moisture from the pork belly!
THE RUB
This is all “per pound.” This recipe is based on an eight pound pork belly so adjust as needed; one tablespoon/teaspoon/day of brining per pound. Pay close attention to the measurements and which ingredient is a tablespoon and which is a teaspoon – I cannot tell you how many times I used to make this mistake!
- Eight teaspoons of black pepper
- Eight tablespoons of quick curing salt
- Eight tablespoons of brown sugar
- Eight tablespoons of real maple syrup
MITCH TIP: do not use fake syrup, this just adds more unnecessary sugar
I rub my dry ingredients on both sides first then place in a large vacuum seal bag. Before sealing, I add the maple syrup and massage the belly so it is completely covered in my cure. Then, I lightly vacuum the bag and double seal each side. I place it on a large cookie sheet and put it into the fridge for EIGHT DAYS. Each day, I flip the belly and give it a nice massage; this goes a long way!
MITCH TIP: Yes, I now CAN tell the difference between a belly that was flipped and massaged daily versus a belly that just sat there for seven days; it makes a HUGE difference!
THE CURE
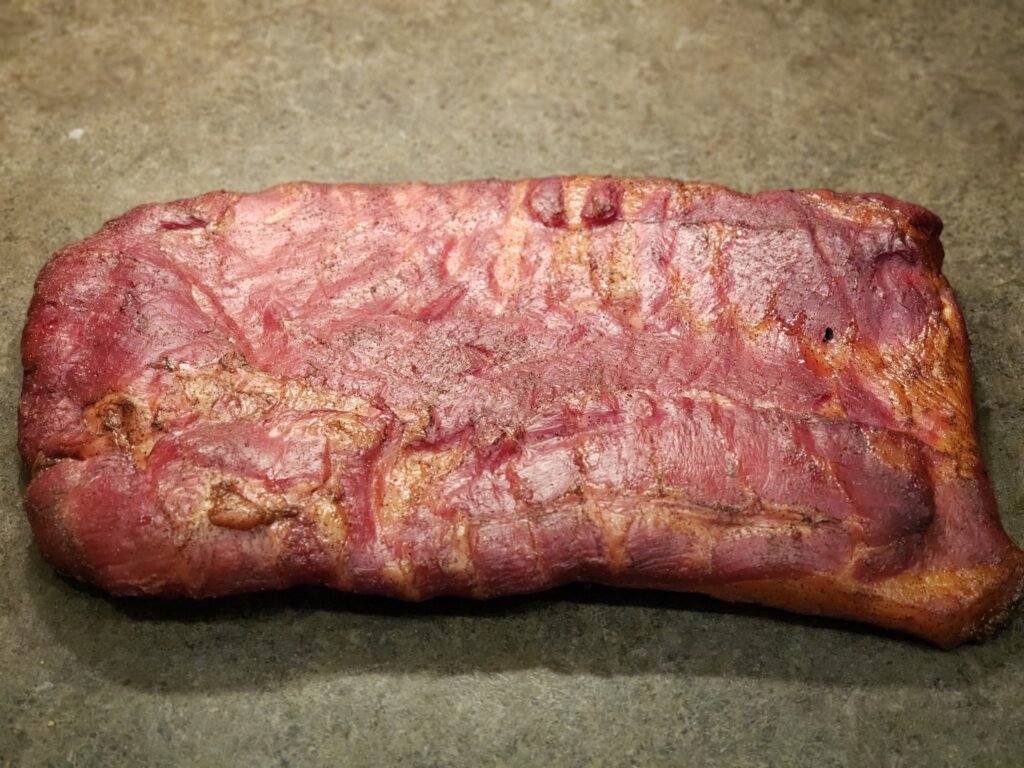
On the eighth day, I remove the belly from the bag, rinse, then pat dry. I place it on a wire rack with a cookie sheet and place BACK into the fridge, uncovered, for one more day. This is CRUCIAL!
MITCH TIP: The next 24 hours uncovered will allow the belly to develop a tacky texture to the skin which allows it to take on as much smoke as possible. If you can go a full 24 hours, great! Otherwise, a minimum of 12 hours will suffice.
THE COOK
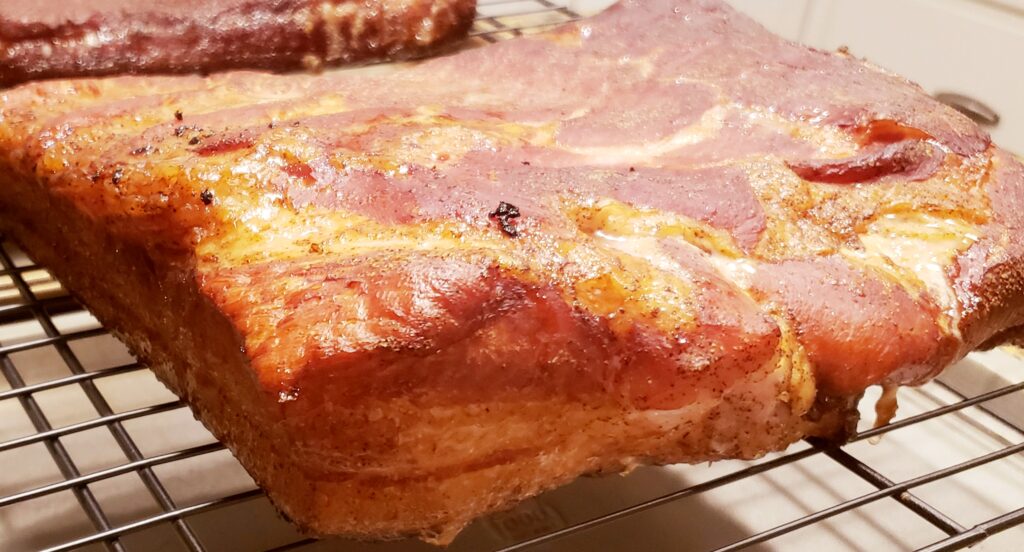
Once the 24 hours is up, I fire up my smoker to 160 and put the belly on the center of the grill, fat side down, with a thermometer in its thickest part. I let it smoke until the internal temperature of the belly reaches 155 degrees. I remove from the grill once it reaches 155 and let it sit on my counter at room temperature for a half hour.
MITCH TIP: I have noticed that having the fat side down ensures a more successful and colorful end result.
After that half hour is done and the belly has come back down in temp, I place it in the fridge for a minimum of four hours. This allows the belly to set AND makes it very easy for me to slice.
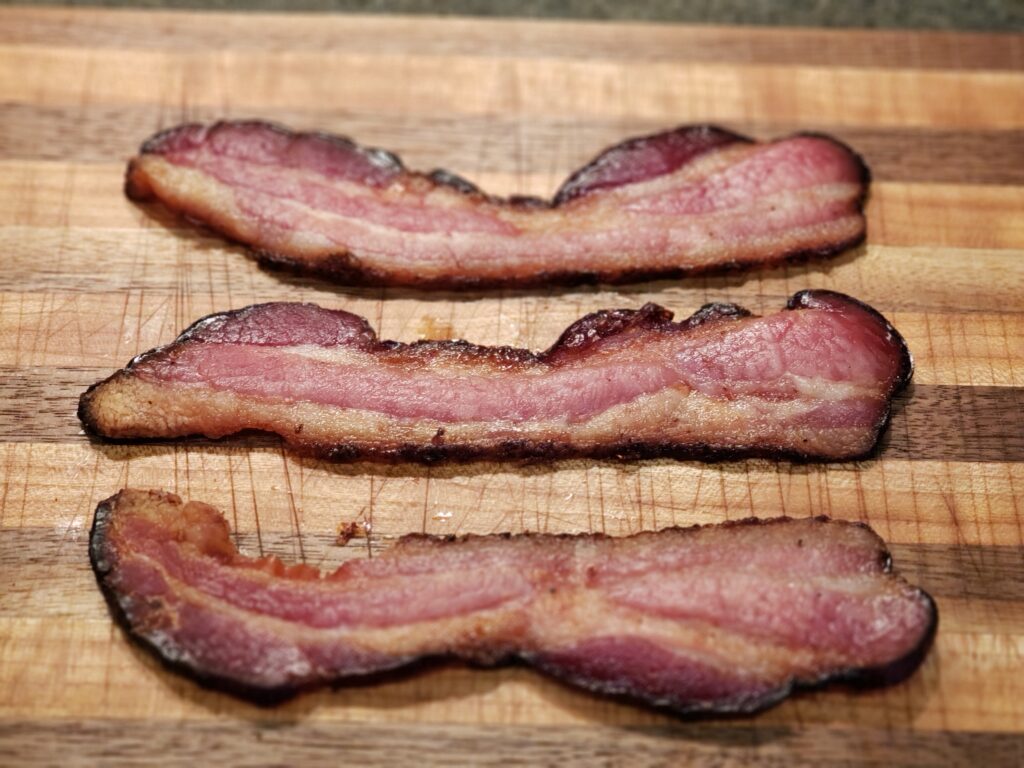
You may slice thin, you may slice thick, heck, do whatever you want! I aim for about 1/16″ thick when hand slicing. You may use a commercial slicer, too, but there’s just something fun about slicing it yourself with a long slicing knife!
Now, you can freezer seal a few packs and leave a few in the fridge to enjoy throughout the week. We keep our bacon in the fridge for up to 10 days then freeze whatever is left; if any!
Here’s how we bake our bacon when we’re ready to eat:
BAKING INSTRUCTIONS
Preheat oven to 400 degrees
Place parchment paper on a cookie sheet
Lay bacon in a uniform line and place in oven for 20 minutes (depends on thickness)
After 20 minutes, check on bacon and flip
Cook for another 10-15 minutes depending on how done you like it